50 lines
1.7 KiB
Markdown
50 lines
1.7 KiB
Markdown
---
|
|
title: How to setup SSH proxy on HiddifyManager
|
|
weight: -70
|
|
---
|
|
|
|
<div dir="ltr" markdown="1">
|
|
|
|
|
|
# SSH proxy setting on HiddifyManager
|
|
|
|
As you know, in version 8 of the HiddifyManager, a proxy for the SSH service has been created, which does not have any access to the server and can only be used as a proxy. This proxy is completely secure and has no fingerprints for identification. (except the SSH protocol itself, which is in general use)
|
|
|
|
Continue with this tutorial to learn how to make its settings on Hiddify panel.
|
|
|
|
## Configure SSH proxy settings
|
|
First, go to the `SSH proxy` section in the panel `Settings`.
|
|
|
|
<div align=center markdown=1>
|
|
|
|

|
|
|
|
</div>
|
|
|
|
Here you can choose your desired port for this proxy. You can also enable or disable this protocol.
|
|
|
|
## Enable or disable proxy
|
|
|
|
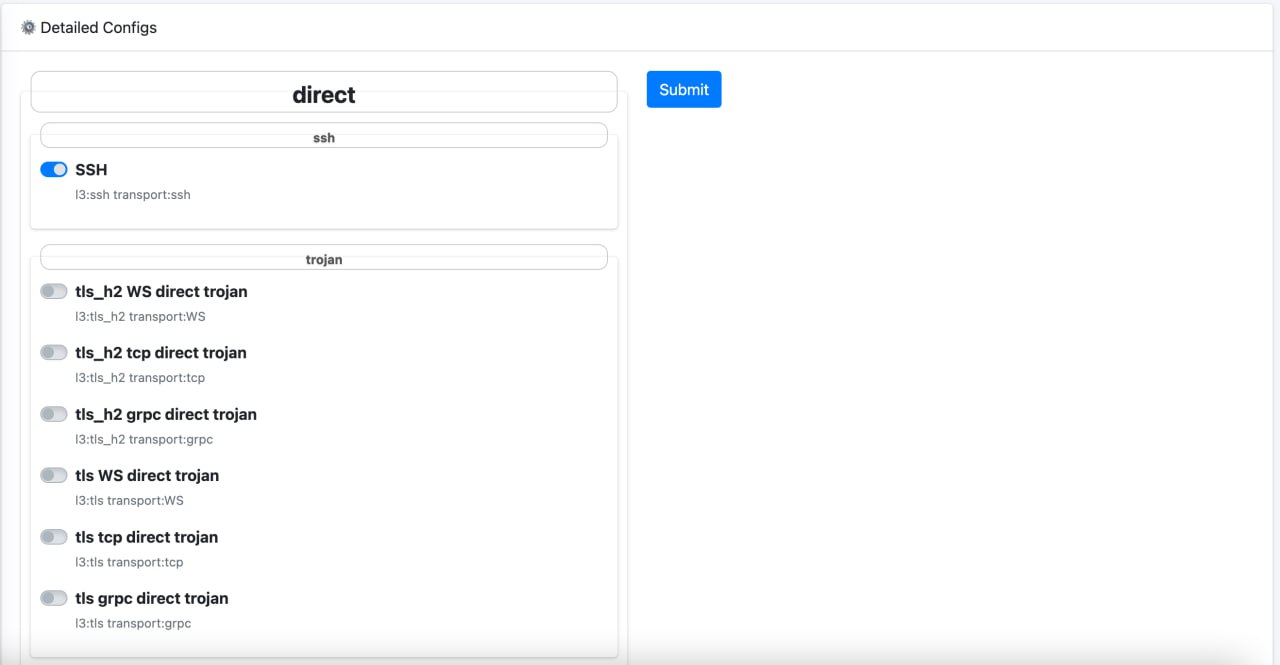
To do this, go to the `Proxies` section from the `Settings` menu.
|
|
|
|
<div align=center markdown=1>
|
|
|
|
|
|
|
|
</div>
|
|
|
|
Here you can enable or disable the SSH proxy.
|
|
|
|
## Use config to connect
|
|
|
|
Now, if you go to your user page in the panel, you will see that the SSH configuration has been added to the previous configurations. This configuration can be added to client app separately.
|
|
|
|
<div align=center markdown=1>
|
|
|
|

|
|
|
|
</div>
|
|
|
|
To use this proxy in the client, you must currently use the SingBox app, which is explained in [this tutorial](/manager/client-software-on-ios/Tutorial-for-SingBox-app/).
|
|
|